Recent Movies

Baked Spaghetti & Meatballs

Growing up I remember Wednesday was the night to go to my friend April's house. Why Wednesday? Because at her house, Wednesday was always spaghetti night. They always had a great spread of garlic bread, salad and really good spaghetti. In fact, every time I make spaghetti, memories of spaghetti night at April's house come to mind. Although it's not Wednesday, this post is dedicated to April for the times I was lucky enough to enjoy spaghetti night with her family. I recently made this Baked Spaghetti & Meatballs that definitely hit the spot and makes for a nice one dish dinner!

Spaghetti and meatballs can certainly be a production to make in the kitchen. You've got the sauce that can take up to a few hours to make for the flavors to develop. The pasta that needs to be cooked to that perfect al dente. And we can't forget the meatballs that are hand rolled and prepared while everything is going on. After all is said and done, the kitchen may look like a disaster and never mind the mountain of things that need to be washed! Well, this version of spaghetti and meatballs is much more easier and will leave your kitchen in decent shape afterward.

The sauce is cooked in a crockpot giving you some time for yourself. For an added treat, I included mini meatballs in this dish that wasn't part of the original recipe. The mini meatballs are formed and simmered with the sauce in the crockpot. The main effort in the dish is just assembling everything in a casserole dish. Layers of the spaghetti, sauce and cheese are put together and baked to perfection.

Baked Spaghetti & Meatballs
recipe adapted from Paula Deen

Mini Meatballs:

1 pound lean ground beef
1 cup fresh bread crumbs
1 tablespoon dried parsley
1 tablespoon grated Parmesan cheese
1/4 teaspoon ground black pepper
1/8 teaspoon garlic powder
1 egg, beaten

Sauce:
2 cups canned diced tomatoes
2 cups tomato sauce
1 cup water
1/2 cup diced onion
1/2 cup diced green bell pepper
2 cloves garlic, chopped
1/4 cup chopped fresh parsley leaves
1 1/2 teaspoons Italian seasoning
1/2 teaspoon garlic powder
1/2 teaspoon onion powder
1 1/2 teaspoons seasoning salt
1 1/2 teaspoons sugar
2 small bay leaves
1 1/2 pounds ground beef
8 ounces uncooked spaghetti pasta
1 cup grated cheddar
1 cup grated Monterey Jack


For the meatballs:
In a large bowl, combine ground beef, bread crumbs, parsley, Parmesan, 1/4 teaspoon black pepper, garlic powder and beaten egg. Mix well and form into 36-48 mini meatballs; set aside. 

Crumble the ground beef in a large skillet. Cook over medium-high heat until fully cooked, with no pink color remaining. Drain the fat from the meat, and then transfer the ground beef to a crockpot. Add the mini meatballs, tomatoes, tomato sauce, water, onions, peppers, garlic, parsley, seasoning mixtures, sugar, and bay leaves. Cover and cook on low for 4 hours.

Preheat the oven to 350 degrees F.

Cook the pasta according to the package directions. Cover the bottom of a 13 by 9 by 2-inch pan with sauce. Add a layer of pasta and then a little less than 1/2 of each cheese; repeat the layers, ending with the sauce.

Bake in the oven for 30 minutes. Top the casserole with the remaining cheese, return it to the oven, and continue to cook until the cheese is melted and bubbly, about 5 more minutes. Cut into squares before serving.

12 'Round the World Ground Beef Recipes...

Ground beef is often buried deep in my freezer somewhere. It's not a particular ingredient I work with often but it does come in handy when I make burgers, meat sauce or even meatballs. Sometimes coming up with other dishes using ground beef can be a challenge though. For those times you may need some recipe inspiration using ground beef, here are 12 'Round the World Ground Beef Recipes to try and venture out into other ethnic cuisines...

Forget going to IKEA for your meatball fix...
Persian fare is so flavorful and fun to eat on a stick!...
Take a tasty trip to Latin America with these empanadas...
We can't forget the U.S & how tasty chili is from Cincy!...
A classic Polish fare, these will have you eating more cabbage in no time!...

Did you know stuffed peppers is a common Balkan dish?!...
Let's not forget our southern neighbors & their influence on Tex Mex cuisine...
This is probably my favorite Greek dish... so comforting & delicious...

Beef Kofta Kabobs
Here's another nod to the Middle East& their wonderful stick foods...

Meatball Lasagna

This Italian inspired dish will satisfy any meat lover...

Kohl Und Hackfleish (German Cabbage Casserole)
Germany is well represented with this casserole...

Bobotie (South African Meatloaf)
Be adventurous & give South African fare a try with this easy meatloaf!

NO-KNEAD OLIVE BREAD

A PICKLE A SCHMICKLE: IT’S ALL A MATTER OF TASTE

Except the vine, there is no plant which bears a fruit of as great importance as the olive.
- Pliny


It must have been our Eastern European Jewish culture, but we were an olive and pickle-loving family. Our refrigerator was always overflowing with glass jars chock full of briny things of every type and kind: olives green and black, thick, crunchy slices of green tomatoes, chilly, crispy sour kraut, spicy hot peppers and tiny cocktail onions. And the pickles! Half-sour, dill, tiny sweet gherkins and those crinkle-cut hamburger slices, just sweet enough with that sour afterbite. Chips, slices, wedges, spears, halves, whole and even relish, we just couldn’t get enough, or so it seemed. Scoops of olives eaten like candy graced the dinner table, or the perfect buffet item, each glistening orb of lusciousness graced with its own toothpick, olives with the pit still in that one had to nibble around with the front teeth like little chipmunks, or olives pitted and stuffed with bright red pimento, the best to accompany a favorite sandwich. The occasional and much-anticipated trip to Miami to visit our Uncle Eli would always include lunch at Wolfie’s where he worked for a while, or those summer vacations in New York to visit mom’s family would invariably find us for at least one meal at some Kosher deli. And what stays in the memory more than any other about these wonderful trips to these bastions of Eastern European Jewish cooking? The tiny aluminum or fluted white ceramic bowl in the center of every table full to overflowing with a choice selection of pickles and olives, an unlimited supply ours for the asking!


Riding high on the briny wave of olive and pickle love, I joined lives and began a brand new culinary adventure with a Frenchman who brought with him into our union jars upon jars of tiny, slim, crispy French cornichons of deep forest green, just two tiny bites needed to finish each off. I fell in love with these sharp, luscious pickles, served and eaten so simply with slices of fresh baguette topped with butter or pâté. Grab the red plastic ring and pull and up will come a dozen or so oblong cornichons on a tray, yours for the picking. And if you are so lucky, grab one tiny, perfectly round, pearly white orb of an onion nestled amongst the green and *crunch* savor the sharpness in one lip-puckering bite. Later on we will, together, hand in hand, discover and bring home big, fat jars of big, fat Malossols à la Russe or espy and partake of the huge barrel hidden behind the counter at Joe Goldenberg’s Jewish delicatessen in Paris where one must know to ask for the fabulous plump kosher dills floating lazily in the brine.

And olives! Our own Mercato Wagner in the center of Milan boasted The Olive Man, a handsome vendor with movie star looks who would wield his ladle at our bidding and scoop down into the trays or bins of whatever we were in the mood for that day. Standing close to the chilly glass case, nose practically pressed up against the pane, we would ogle, ponder, hesitate as we tried to decide between all of the flavors offered. And it was here that I discovered and fell madly in love with Olive Dolce, known in France as Olive Lucque, beautiful cured green sweet olives rather than salty or sour.


And the next generation, inheriting our own tastes yet forming their own briny habit, grew to love the pungent, salty, snappy flavors of these bite-sized treats! More olive than pickle men, our sons grew up eating bowl after bowl of the green, black, brown and violet, salty, spicy, tangy, marinated in lemon or basil, garlic or hot peppers, stuffed with pimento, almonds, anchovies (okay, only I love the anchovy-stuffed olives), on pizza or in tagines, they can never get enough! Trips to the grocery store find our basket filled with jars upon jars of them, excursions to the market and we haggle with each other over our choice as we stand patiently in line, often compromising by selecting two different type olives. And maybe a barquette of olive tapenade. And some marinated baby artichokes. You see my point? But let those boys make their own lunch or dinner, grilled cheese or peanut butter sandwich, breaded chicken cutlet or a juicy beef burger, and that jar or plastic sachet of olives will find itself hugged close to their plate, spoon digging down into the faintly murky liquid searching for each gem, those olives eaten one after the next like French fries and by the end of that meal the jar would be, yes, empty.

And then there is Olive Bread!

I would say to housewives, be not daunted by one failure, nor by twenty. Resolve that you will have good bread, and never cease striving after this result till you have effected it. If persons without brains can accomplish this, why cannot you?
- Housekeeping in Old Virginia, Marion Cabell Tyree, 1878


This month’s Bread Baking Day #38 is hosted by my friend Cinzia of Cindystar Blog and she is having a No-Knead Festival! I first made a no-knead bread with my lovely friend Clare on one of her visits and I was simply astounded at what a fabulous, gorgeous bread could come out of no-knead dough! And then I bought Artisan Bread in Five Minutes a Day by Zoë François and Jeff Hertzberg, M.D. (fellow Penn alum!) and how I adore no-knead bread! It comes out perfect every single time! I have used their recipes for making fabulous perfect Challah and their Olive Oil Dough for both my Olive, Sun-Dried Tomato and Pine Nut Focaccia and my fabulous Stuffed Focaccia (filled with roasted tomatoes, rocket, chorizo and mozzarella).

It has been much too long since I baked for Bread Baking Day, one of my favorite food blogging events created by my lovely friend Zorra but BBD #38 has me back, for I could not resist baking a No-Knead Bread. And I have returned to our favorite, the Olive Oil Dough and made Olive Bread. Simply divine! What better way to share my love of both olives and bread than this wonderful, dense, tender loaf chock full of big, fat, juicy, plump, salty black Greek olives? Mmmm.

The smell of good bread baking, like the sound of lightly flowing water, is indescribable in its evocation of innocence and delight.
- M. F. K. Fisher


And I share this fabulous, tender, flavorful loaf with Susan of Wild Yeast and Yeastspotting!

NO-KNEAD OLIVE OIL DOUGH
Makes enough dough for four 1-pound loaves. Perfect for pizza, focaccia or olive bread.

2 ¾ cup (650 ml) lukewarm water
¼ cup (50 ml) extra virgin olive oil
1 ½ Tbs (15 g) active dry yeast
1 ½ Tbs salt
1 Tbs sugar
6 ½ cups (975 g) flour (I used read flour type 55, you can use all-purpose)

Combine the yeast, salt and sugar in a very large mixing bowl or a lidded (not air-tight) food container. Add the olive oil and the lukewarm water.

Stir in the flour with a wooden spoon (although you can use a food processor with a dough attachment or a heavy-duty standing mixer with a dough hook) until completely blended. If you have trouble getting the last bit of flour to blend in you can use your wet hands.

Cover the bowl with plastic wrap (not air tight) and allow to stand at room temperature for 2 hours, until the dough has risen and then collapses or flattens on top.

The dough can now be used immediately or stored in the bowl covered with plastic wrap or a lidded (not air tight) container for up to 2 weeks. It is easier to work with when chilled.

OLIVE BREAD
Slightly adapted to my own desires!


1-pound (500 g – size of a grapefruit) portion of the Olive Oil Dough
¼ cup high-quality pitted olives
About 1 Tbs Zahatar seasoning (dried ground Zahatar, sesame seeds, spices, salt, olive oil)
Olive oil for brushing the loaf

Dust the surface of the refrigerated dough with flour and cut out a grapefruit-sized piece. Using a rolling pin on a floured work surface, flatten the dough to a thickness of ½ inch. Spread the olives evenly over the surface, leaving about an inch around the edges olive free. Dust with about half the Zahatar, if you desire. Roll the dough up around the olives and shape it into a smooth ball by stretching the surface of the dough around to the bottom on all four sides, rotating the ball as you go. Place the ball of dough on a parchment or oven-paper lined baking sheet, cover loosely with plastic and allow to rest for 1 hour. It will rise slightly.

Preheat the oven to 450°F (230°C). Gently brush the entire surface of the dough with olive oil and dust with the remaining Zahatar. Make slashes across the top of the bread using a serrated or very sharp bread knife. Bake the bread for about 35 minutes until a deep golden brown.


Homemade Cannoli

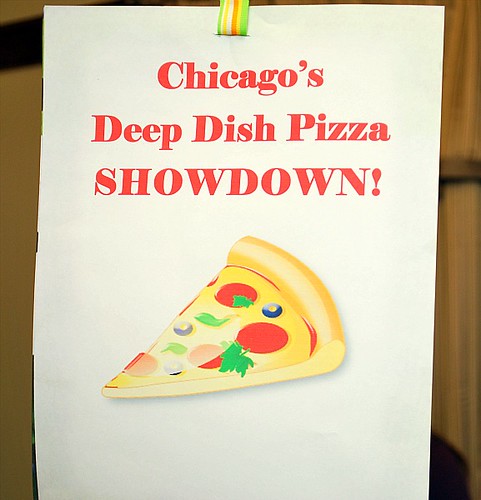
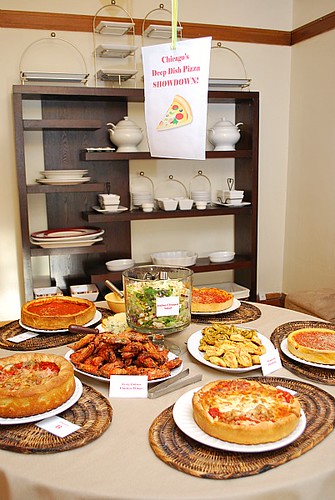
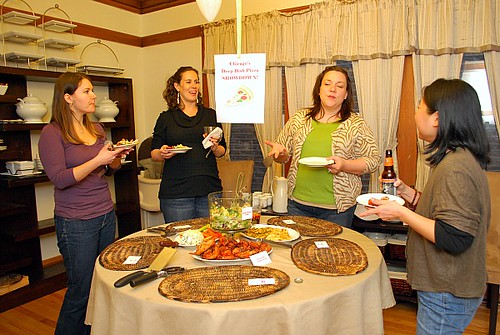
When you're throwing an Italian inspired party, it can be quite a task to come up with a dessert only fitting for the menu. For the recent 
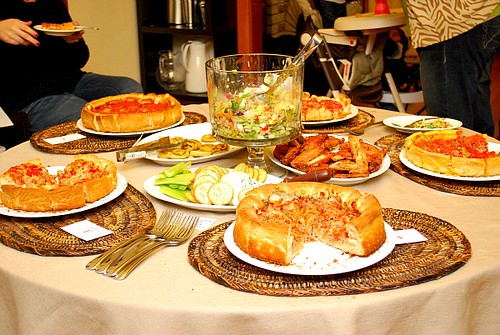
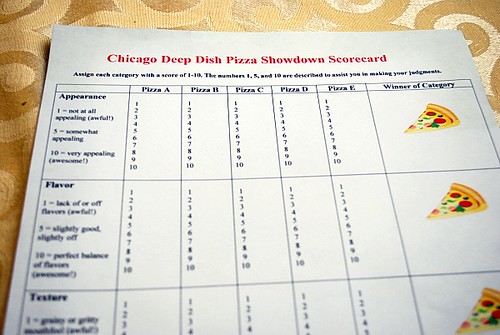
Chicago Deep Dish Pizza Showdown party I threw, my menu was Italian inspired and well, pizza heavy. For dessert, I wanted something light but some of the dessert ideas I came across seemed too heavy. I also wanted my guests to have fun and I know my friends like to be interactive in the kitchen. So I did some thinking and remembered how much I enjoyed fresh cannoli in the North End neighborhood of Boston. 
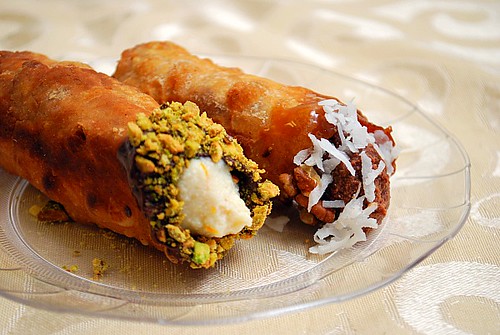
Homemade Cannoli was the perfect dessert for my party menu and to take it a step further, I set up a cannoli bar for my guests to play and make their customized cannolis...

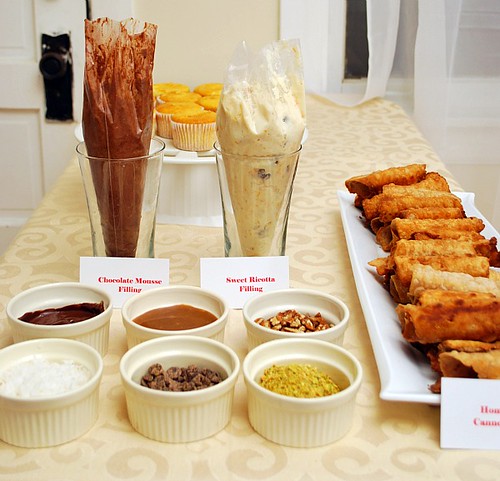
I love incorporating a dessert bar at my parties, especially where I can offer a dessert that will allow my guests some variety and some fun to customize them to their tastes. I set up my cannoli bar with homemade cannoli shells, a few nuts (pistachios and pecans), a couple dipping sauces (mint chocolate and butterscotch caramel) and additional garnishes (chopped chocolate and sweetened coconut.)

For the cannoli fillings, I had a chocolate mousse filling and a more traditional sweet ricotta filling available (recipes to follow below). But by far, the most time consuming task in preparing this cannoli bar was making the homemade cannoli shells. I had a few recipes to draw from but ultimately decided on one from a fellow blogger that hosted the Daring Bakers challenge. The dough wasn't too difficult to make and I especially liked the subtle flavor of chocolate and cinnamon. The wine also came through but more as a faint aroma than an actual flavor in the dough. Nonetheless, it was definitely a winner for me. After testing out the recipe a few times before my party, I'm pretty confident about making this and even came up with some shortcut tips!

The original recipe for the dough calls for rolling it out thin and using a large cookie cutter. I found when I followed these steps I ended up with a lot of scraps that really couldn't be worked into a dough to use again. So instead of rolling out and using a cookie cutter, I just portioned out the dough into the number of cannoli I want to make... and then roll each portion into a ball. This ball is then rolled out into a very thin oval shape that I roll using the cannoli tube. Doing it this way eliminated the amount of waste and the step of rolling out and using a cookie cutter.

Another thing to note is that I happen to like the rustic look of cannoli in that they don't look exactly alike and aren't all perfectly rolled out ovals before rolling onto the cannoli tube. To me, the flavor is what matters and after all the garnishing, it doesn't really matter if the cannoli was perfectly shaped anyway! If you've never made homemade cannoli before, here's a perfect opportunity. It's fun and oh so delicious...

* I purchased 8 cannoli tubes made by Ateco brand. Look for them at a specialty shop like Sur la Table (where I purchased mine.)

Homemade Cannoli Shells
recipe as seen on Parsley, Sage, Desserts & Line Drives

2 cups all-purpose flour
2 tablespoons sugar
1 teaspoon unsweetened baking cocoa powder
1/2 teaspoon ground cinnamon
1/2 teaspoon salt
3 tablespoons vegetable or olive oil
1 teaspoon white wine vinegar
1/2 cup sweet Marsala or any white or red wine (I used white wine)
1 large egg, whisked with 1 teaspoon of water
Vegetable or any neutral oil for frying – about 2 quarts

Garnishes: 1/4 cup of each
toasted chopped pistachio nuts
toasted chopped pecans
chopped or mini chocolate chips
shredded sweetened coconut
butterscotch caramel sauce
melted chocolate sauce
confectioners’ sugar


In the bowl of a stand mixer fitted with the paddle attachment, combine the flour, sugar, cocoa, cinnamon, and salt.

Combine the oil, vinegar, and enough of the wine in a 1 cup measuring cup and slowly pour into the stand mixer bowl to make a soft dough.

Remove the paddle attachment and replace with the dough hook attachment. Continue kneading dough in the stand mixer kneading until smooth and well blended, about 2-4 minutes.  Remove the dough from the bowl of the stand mixer and shape the dough into a ball. Cover with plastic wrap and let rest in the fridge from 2 hours to overnight.

Allow the dough to come to room temperature. Cut the dough into two pieces. Keep the remaining dough covered while you work. Lightly flour a large cutting or pastry board and divide the dough into 6 equal portions. Roll each portion into a ball in your hands and using a rolling pin, roll the dough until super thin, about 1/16 to 1/8” thick. Roll the dough into an oval, rolling it larger and thinner if it’s shrunk a little.

Oil the outside of the cannoli tubes. Roll a dough oval from the long side around each tube/form and dab a little egg wash on the dough where the edges overlap. Press well to seal. Set aside to let the egg wash seal dry a little.

In a deep heavy saucepan, pour enough oil to reach a depth of 3 inches, or if using an electric deep-fryer, follow the manufacturer’s directions. Heat the oil to 375°F (190 °C) on a deep fry thermometer, or until a small piece of the dough or bread cube placed in the oil sizzles and browns in 1 minute. Have ready a tray or sheet pan lined with paper towels or paper bags.

Carefully lower a few of the cannoli tubes into the hot oil. Do not crowd the pan. Fry the shells until golden, about 2 minutes, turning them so that they brown evenly.

Lift a cannoli tube with a wire skimmer or large slotted spoon, out of the oil. Using tongs, grasp the cannoli tube at one end. Very carefully remove the cannoli tube with the open sides straight up and down so that the oil flows back into the pan. Place the tube on paper towels or bags to drain. Repeat with the remaining tubes. While they are still hot, grasp the tubes with a potholder and pull the cannoli shells off the tubes with a pair of tongs, or with your hand protected by an oven mitt or towel. Let the shells cool completely on the paper towels. Place shells on cooling rack until ready to fill.

Repeat making and frying the shells with the remaining dough. If you are reusing the cannoli tubes, let them cool before wrapping them in the dough.


Chocolate Mousse Filling
recipe from Wilton

4 eggs separated
1 cup milk
1 1/2 cups (4 ounces) bittersweet chocolate chips
1 teaspoon vanilla extract
1 cup heavy cream, whipped

In medium saucepan, combine egg yolks and milk. Heat over low heat, stirring constantly, until mixture is almost boiling and is thickened enough to coat spoon. Remove from heat. Stir in chocolate chips, vanilla and liqueur; continue stirring until chocolate is melted. Cool to room temperature, stirring occasionally. Beat egg whites until stiff; fold gently into the chocolate mixture. Fold in whipped cream. Refrigerate until ready to use.

Sweet Ricotta Filling
recipe from Ateco (back of Cannoli tube package)

4 cups (2 pounds) ricotta
1 1/2 cups powdered sugar
4 teaspoons vanilla extract
1/4 cup orange zest
1/4 cup lemon zest
1/4 cup chocolate chips

Place ricotta in wet cheesecloth and wring out as much moisture as possible. If needed, strain overnight to remove excess liquid.

Combined strained ricotta with remaining ingredients. Cover and chill for at least 2-3 hours or overnight for flavors to meld.

10 Sweet Lemon Recipes to Pucker Up To...

Now that it's spring, you'll find lots of great seasonal produce available... so take advantage! Lemons are definitely in season so you may find them on sale at your local grocery store. Grab a few lemons and aside from making lemonade, try one of these 10 Sweet Lemon Recipes to Pucker Up To...

Strawberry and lemon make these scones a sweet way to start the day...
Blueberries and lemon are another great fruit pair, as seen in these sweet little bites...
Have your lemon bundt cake & eat it too with this mini version...
This tart using the entire lemon - zest, juice, seeds... the whole thing!
A fave recipe adapted from Ina Garten...
Lemon and honey are also a great combo, especially in these muffins...
Anything becomes fancy when served in a martini glass, like these sweet parfaits...
A copycat recipe of Olive Garden's popular cake...
This is a definite must for any proper spring tea party!...
If you're an ice cream fan, you'll want to indulge in this easy lemon ice cream recipe...

TramOrama

Check out this SlideShare Presentation:
This year 120 years of use of tram are completed at Europe. Look some pictures and informations of this ecological means of transport on Paris, Munich, Berlin, Vienna, Amsterdam, Helsinki, Graz, Linz, Konstanz, Dresden, Innsburg, Prague, Freiburg im Breisgau and Athens.

Zesty Italian Chicken Wings

Pizza and wings - a likely combination right? My recent Chicago Deep Dish Pizza Showdown party was the perfect opportunity to use the same combination for my menu... but regular buffalo or hot wings wasn't going to do. I wanted something a little different but still flavorful. That's when I came across a delicious recipe for Zesty Italian Chicken Wings. It was perfect since the rest of my menu items were Italian inspired and these wings definitely packed in a punch of flavor!...

You've probably heard the term brining during the Thanksgiving season. Commonly seen when preparing turkey, it's a process where meat is soaked in a brine (read: salty water) before cooking. This recipe also calls for brining. In fact, the chicken wings are brined for a brief moment before marinating in a mixture of oil, garlic, dried herbs, crushed red pepper and lemon juice. After a few hours of marinating, it was on to the fryer with the wings. These were definitely zesty, crispy and a great alternative to the usual buffalo hot wing!

Zesty Italian Chicken Wings
recipe adapted from Food52

  • 3/4 cups olive oil
  • 5 garlic cloves, smashed
  • 1 tablespoon dry rosemary
  • 1 tablespoon dried oregano
  • 1 tablespoon dried basil
  • 1 teaspoon crushed red pepper
  • juice of half a lemon
  • 1 teaspoon kosher salt, for the marinade
  • 1/2 cup hot water
  • 2 tablespoons honey
  • 3 1/2 cups cold water
  • 2 tablespoons kosher salt, for the brine
  • 2 pounds chicken wings, cut in half at the joint
  • oil for frying 
  • 1/2 cup cornstarch
  • 2 tablespoons unsalted butter, melted
  • a few dashes of your favorite hot sauce, or more to taste (we like Cholula)

For the marinade, heat the oil and garlic until warm. Add herbs, crushed red pepper, lemon juice and salt. Mix and set aside.

In a large pot, combine hot water and honey until dissolved. Add the cold water and salt and stir until most of the salt has dissolved. Add the chicken wings and brine for 30 minutes.
Remove wings from brine and place on a cooling rack set over a sheet pan. Let wings dry thoroughly, patting with paper towels if necessary.

Reserve 2 tablespoons of the marinade for later and pour the rest in a gallon-sized zipper freezer bag. Add the wings. Seal the bag tightly. Gently massage the marinade around all the wings. Place bag in fridge for several hours, or overnight.

Preheat deep fryer or large dutch oven with oil. Oil should be heated to 350 degrees for frying. At the same time, preheat oven to 200 degrees.

Remove bag of wings from fridge while oven is preheating. Toss and coat marinated chicken in cornstarch. Once oil is hot enough for frying, place a few chicken wings in the hot oil and fry in small batches. Cook chicken until juices run clear. Place cooked chicken wings on a baking sheet and keep warm in preheated oven. Continue frying remaining chicken in batches and keep warm in oven. 

Once all chicken has been fried, place in a large serving bowl. Combine together the reserved marinade, melted butter and hot sauce. Toss with chicken wings to coat and serve hot.

Orecchiette with Swiss Chard, Red and Yellow Peppers and Goat Cheese –Finally a new blog post!!!

So I really don’t want to even look and see when the last time I posted a recipe was. I am very, very ashamed. I really have no excuse besides being totally rushed off of my feet all the time and totally uninspired come dinner time. Usually it’s just a meal thrown together and always an old stand by. Something tried and true (and already blogged more than likely).
I happened to see this recipe though the other day and printed it out immediately. So glad I did! It is really a delicious and simple meal.

Orecchiette with Swiss Chard, Red and Yellow Peppers and Goat Cheese – From The New York Times
When making this easy pasta, be sure to cut the sweet bell peppers into very small dice; that way, they’ll lodge in the hollows of the orecchiette, along with the chard and goat cheese.
Ingredients:
3/4 pound Swiss chard (1 bunch), stemmed and washed in two changes of water
1 tablespoon extra virgin olive oil
2 red/yellow bell peppers , cut in small dice
Pinch of red pepper flakes (optional)
1 to 2 garlic cloves (to taste), minced
Salt and freshly ground pepper
1 teaspoon chopped fresh marjoram (I had just thrown my dry marjoram out so I used 1 teaspoon dried Italian Seasoning)
3/4 pound orecchiette
2 ounces goat cheese, crumbled (1/2 cup)
Directions:
1. Begin heating a large pot of water while you stem and wash the chard. Fill a bowl with ice water. When the water in the pot comes to a boil, salt generously and add the chard. Blanch the chard leaves for one to two minutes until tender. Using a skimmer or a slotted spoon, transfer the chard to a bowl of ice water, then drain and squeeze out excess water. Chop medium-fine. Keep the pot of water at a simmer.
2. Heat 1 tablespoon of the olive oil over medium heat in a large, heavy skillet, and add the bell peppers and the red pepper flakes. Cook, stirring often, until tender, five to eight minutes. Add the garlic and salt to taste, and stir for half a minute. Then stir in the chopped chard and the marjoram. Stir together for a few seconds, then turn the heat to very low.
3. Bring the water in the pasta pot back to a boil, and add the orecchiette. Cook al dente, following the timing instructions on the package. Add about 1/2 cup of the pasta water to the pan with the chard and peppers. Stir in the goat cheese. Drain the pasta, transfer to the pan and toss with the chard, pepper and goat cheese mixture. Serve hot.
Yield: Serves four.
***Loved this pasta. The only thing I will do differently next time is to skip the blanching of the swiss chard. I think it will just be fine steamed in with the peppers and garlic. Also won’t loose all the nutrients in the pasta water.
signature

Wretches and Jabberers Review "Disabled Doesn't Meant Dumb" - Is It OK For Higher Functioning Persons with Autism to Mock Intellectually Disabled?


"Disabled Doesn't Mean Dumb" is the title of an Associated Press (John Curran) review of "Wretches and Jabberers" published online in the Washington Times. W and J is said to be a documentary by Tracy Thresher and Larry Bissonnette, 2 non verbal persons with autism who have been able to communicate via augmentative technologies including equipment which converts typed messages into voice communication.  The two were presumed to lack intelligence because of their inability, prior to the introduction of the augmentative technology, to communicate. Now they are sought after as speakers and field questions about autism including autism and intelligence:

"For 10 years, Mr. Thresher and his friend Larry Bissonnette, 53, have been advocates for people with autism and the disabled community at large. They are about to get a new platform for spreading their can-do message: They are the focus of “Wretches and Jabberers,” a documentary film opening in 40 cities that makes the point that “disabled” doesn’t mean “dumb.”"

The message seems to be a positive one for the most part in that they are using their life stories, and humor, to let the world know that some non verbal people with autism may be quite intelligent.   The substance of the  review though suggests that the documentary will  also assist those who wish to pretend, contrary to several credible professional reviews,  that intellectual disability is not related to Autistic Disorder as it is currently defined.  The Intellectual Disability characterizing 80% of persons with Autistic Disorder is just another autism "coincidence". The article title is not necessarily theirs but it does seem to reflect the implicit message of the documentary, as reviewed,   that it is OK to mock those with intellectual disabilities.

As World Autism Awareness Day approaches the Intellectual Disability of the vast majority (as described  by CDC Autism Expert Dr. Marshalyn Yeargin-Allsopp  ) of those with Autistic Disorder will again be pushed further and further out of sight.   After all Thresher and Bissonnette are "not dumb" and therefore all non verbal persons with autism disorders are "not dumb" ... not Intellectually Disabled.  

Italian Chopped Salad

When you're serving up several varieties of pizza like I did at my recent Chicago Deep Dish Pizza Showdown party, you definitely want to balance the meal with some vegetable dishes. With that in mind, I prepared this Italian Chopped Salad that went perfectly with the pizza and other Italian inspired fare on the menu. Loaded with fresh mozzarella, sliced pepperoni, diced roasted red bell peppers and chickpeas, it's a great Italian salad that's easy to put together and a hit at the table!

I personally love chopped salad and when I thought about a salad to add to my party menu, I thought an Italian version would be perfect - and it was!  This was a breeze to make because the salad can be prepped and done in advance. Just before serving, whisk the dressing ingredients together and toss with the salad to combine. The flavors and textures work so well together and I've now become a fan of chickpeas in my salad... and I think you will too after trying this recipe!


Italian Chopped Salad
recipe adapted from Food & Wine

Salad:
1 (16 oz) bag prepared salad mix (I used a romaine salad mix)
1/3 cup diced red onion
1/2 cup canned chickpeas (garbanzo beans), drained and rinsed
1/2 cup diced tomatoes
1/2 cup sliced pepperoni
1/4 cup diced jarred roasted red peppers
1/2 cup diced fresh mozzarella
1/4 cup shredded Parmesan cheese

Dressing:
3 tablespoons red wine vinegar
1/4 cup olive oil
1/2 teaspoon salt
1/4 teaspoon fresh-ground black pepper
1/2 teaspoon dried oregano
1/2 teaspoon dried basil
1/2 cup grated Parmesan


In a large glass or stainless-steel bowl, combine the salad ingredients and toss.

For the dressing, combine the vinegar, oil, salt, oregano, basil pepper, and Parmesan in a small bowl. Drizzle over salad just before serving and toss thoroughly to combine the ingredients.

Spinach & Artichoke Cheeseball

One of the most requested dips I make at family get togethers is my Spinach & Artichoke dip. It's warm, cheesy and addictive, especially with warm slices of bread or toasted crostini. But rather than bringing the same dip served the same way, I wanted to switch things up a bit. This time around I made a Spinach & Artichoke Cheeseball that was definitely a bit hit at my Chicago Deep Dish Pizza Showdown party. It's all the deliciousness of a spinach and artichoke dip all rolled up in a ball - literally!

As one might assume, this Spinach & Artichoke Cheeseball has both spinach and artichoke. To hold it together, a mixture of cream cheese, mozzarella cheese and Parmesan cheese makes this a definitely cheeseball. But the secret, in my opinion, is the dry ranch dressing mix. It brings a subtle ranch flavor that really goes well with all the other ingredients.

Spinach & Artichoke Cheeseball
recipe adapted from AllRecipes

2 (8 ounce) packages cream cheese
1 (10 ounce) box frozen chopped spinach, thawed and squeezed dry
1/4 cup shredded mozzarella cheese
3/4 cup shredded Parmesan cheese, divided
1 (4 ounce) can artichoke hearts, drained and chopped
2 teaspoons minced garlic
1 tablespoon dry ranch salad dressing mix


In a large bowl, combine the cream cheese, spinach, mozzarella cheese, 1/4 cup of Parmesan cheese, artichokes, garlic and Ranch dressing mix. Mix together with clean hands until well blended. Form into a ball or log and coat in the remaining 1/2 cup Parmesan cheese. Chill for at least 1 hour. Place on a serving plate and serve with crackers and/or vegetable crudités.

Foodbuzz 24x24: Chicago's Deep Dish Pizza Showdown!

It's been confirmed, we love Chicago. We really, really do and what solidified it for us was being away from this wonderful city for nearly a year. Just before our son was born, we said goodbye to Chicago's downtown highrise living and headed up north to the suburbs, just on the border of Illinois and Wisconsin. While living there, we missed the energy of the city, the diversity and most of all, the food! Fast forward to 10 months later, we returned back to Chicago and have settled in again. This city is truly home for us and we're so happy to be back.

To celebrate, we've invited our foodie friends over for a special night with one of Chicago's famous foods - deep dish pizza. But this was not your regular pizza party... we hosted our very own Chicago Deep Dish Pizza Showdown! To make our event even more special, FoodBuzz is featuring our Chicago Deep Dish Pizza Showdown for their March 24x24 Food Event. The FoodBuzz's 24x24 Food Event showcases food blog posts from 24 Foodbuzz Featured Publisher bloggers of 24 unique meals occurring around the globe during a 24-hour period. I was thrilled to be featured this month!

What exactly is Chicago Deep Dish Pizza? For one, this pizza is unlike the traditional pizzas. In fact, it's more like a savory pie. The pizza's crust is usually three inches high, is thick and much more doughy. Another distinction is how the toppings are layered into it. Cheese is the first layer on top of the crust, followed by your favorite toppings, and is finished off with a layer of sauce. Our personal favorite is the traditional cheese and sausage where some places make an entire disk of sausage the size of the pizza pan to put in the pizza!

So, why pizza?! Finding good pizza in the suburbs where we used to live was a challenge. We were surrounded by several national pizza chains and very few independent pizzerias really knew how to make a true Chicago Deep Dish Pizza. When we moved back to Chicago, it was a great feeling to know there were several places to get our Chicago Deep Dish Pizza fix. With that in mind, the idea of having pizza from all the popular Chicago spots led us to hosting our very own Chicago Deep Dish Pizza Showdown. We had quite a pizza spread with a homemade deep dish pizza and 4 popular places represented including...

Aside from pizza, I also prepared a few accompaniments including...

Spinach & Artichoke Cheeseball
with crackers and vegetable crudites

Pepperoni Pinwheels & Pesto Pinwheels
Italian Chopped Salad

Zesty Italian Chicken Wings


To end on a sweet note, I also had fun preparing a special dessert table! Friends enjoyed the 'Cannoli Corner' I set up, complete with homemade cannoli shells, two different cannoli fillings (Sweet Ricotta and Chocolate Mousse) and a variety of garnishes to coat the ends in (pistachios, pecans, chocolate chips, shredded coconut, butterscotch caramel sauce, and mint chocolate glaze.)


With so much food to indulge in, we washed things down with sodas("pop"), beer, sweet tea and sangria...

Our friends are big Chicago foodies that know all about Chicago Deep Dish Pizza. In fact, some have strong opinions on which Chicago deep dish pizza is the best. But to put things to the test, we offered up the pizzas as a blind tasting where they weren't told where the pizzas came from... and that one was a homemade version. We gave each pizza a letter and provided our friends with a pizza scoring card. They were asked to rate each pizza by appearance, flavor, texture and overall rating on a scale of 1 to 10, 1 being "awful" and 10 being "awesome."


It took awhile to tally up the totals. We determined the winner of each category for appearance, flavor and texture, along with the overall rating. It was so close between 2 specific pizzas that we had to calculate the averages between the two to come up with the one true winner. (But this was no surprise... us Chicagoans are serious about our pizzas!)
 

Just before the party ended, the pizzas were identified and results were announced:
  • Winner for appearance category - the homemade pizza
  • Winner for the flavor category - Lou Malnati's pizza
  • Winner for the texture category - Giordano's pizza

So who is the overall winner and where is the best Chicago Deep Dish Pizza from?! Well, if you ever find your way to Chicago (or are currently a resident), based on our blind tasting, our recommendation for the best place to go for your Chicago Deep Dish Pizza is....


And in second place, just but by  fraction of a point, the runner up Chicago Deep Dish Pizza winner is...


Stay tuned as all recipes I prepared for our Chicago Deep Dish Pizza Showdown spread will be featured here everyday this week!

Labels

أحدث المواضيع

 
Support : Creating Website | Johny Template | Mas Template
Copyright © 2013. Entries General - All Rights Reserved
Template Created by Creating Website Published by Mas Template
Proudly powered by Blogger