
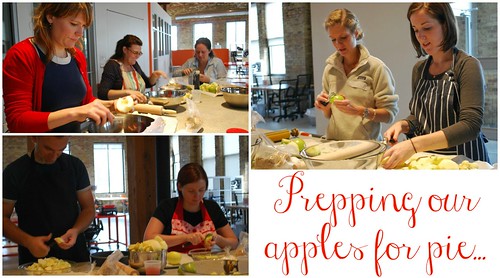
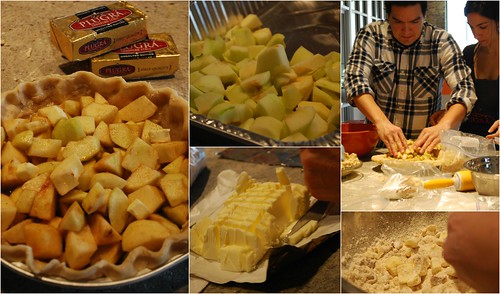
It's that time of year and if you don't have pie on the brain, you should! One of the classes I've taught recently was a pie class and it was so much fun. My students got a head start on their pie making skills just in time for the holidays and this week I'll be featuring a couple versions of apple pie that we made. But even before we get to the amazing fillings that pie is known for, the trickiest and most essential part of pie is the dough. I helped students learn how pie dough is actually something that's approachable and easy to do! An All Butter Pie Dough makes for a perfect crust of buttery, flaky layers that will serve as a delicious foundation for all the holiday pies in store...
To help me achieve the ultimate all butter pie dough, I partnered up with my friends at Plugra European butter. They helped sponsor the class by providing mountains of their glorious butter, aprons for my students and a ton of ideas on how to use their butter in pies and other dishes. For our class, Plugra was the perfect choice in our all butter pie dough recipe.
The recipe I used in class was from my favorite local pie shop, Hoosier Mama's Pies. They recently featured a new cookbook full of their recipes and they are so approachable! For the class, we used their all butter pie dough recipe which really highlighted Plugra butter perfectly.

The Hoosier Mama Book of Pie reveals the secrets of Paula Haney’s acclaimed pie shop, featuring over 350 pages of sweet and savory recipes, tips, how-tos, and photos. The cookbook design is a delightful nod to the 1950s, and the recipes are sure to please even the most discriminating pie enthusiast.
The Hoosier Mama Book of Pie is filled with more than 120 delectable pie recipes from the nationally acclaimed Hoosier Mama Pie Company. Author Paula Haney (along with savory pie chef Allison Scott) leads readers through everything necessary to make the perfect pie, including the keys to turning out a flaky, golden crust, making the silkiest cream filling, and ensuring a light, fluffy quiche.
The recipes are split into two sections: Sweet Pies and Savory Pies. Sweet Pies are further divided into seasonal farmers’ market pies; creams, custards, and curds; “desperation” pies (so named because they were traditionally made from unconventional ingredients during bleak winters); chess pies; over-the-top pies; and turnovers. The Savory Pies section features recipes for seasonal savory pies, quiches, and hand pies.
Paula Haney founded Hoosier Mama Pie Company in 2009. An Indiana native, she was formerly the head pastry chef at Pili.Pili, One Sixtyblue, and Trio, where she worked with head chef Grant Achatz. Haney and her family live in Chicago, IL. Allison Scott works at Hoosier Mama Pie Company and develops its savory pies. She lives in Chicago, IL.
Hoosier Mama's All Butter Pie Dough
Makes one double-crust pie or two single crust pies
1 ¾ sticks unsalted Plugra butter, divided*
1 tablespoon red wine vinegar
½ cup cold water
2 ¼ cups all-purpose flour
2 1/4 teaspoons kosher salt
½ tablespoon granulated sugar
1 tablespoon red wine vinegar
½ cup cold water
2 ¼ cups all-purpose flour
2 1/4 teaspoons kosher salt
½ tablespoon granulated sugar

* The Plugra 8oz 'brick' = 2 standard sticks of butter... so I cut the Plugra brick in half lengthwise so I have 2 sticks of butter to use as needed in recipes.
Cut the butter into ½ -inch cubes. Freeze 5 tablespoons for 20 minutes or overnight; chill the remaining 1 ¼ sticks in the refrigerator until ready to use.
Cut the butter into ½ -inch cubes. Freeze 5 tablespoons for 20 minutes or overnight; chill the remaining 1 ¼ sticks in the refrigerator until ready to use.
Stir the red wine vinegar into the cold water and set aside.
Combine the flour, salt, and sugar in the bowl of a food processor and pulse 5 or 6 times to combine.
Add the chilled butter and mix for 25 to 30 seconds, until the mixture resembles coarse meal.
Add the frozen butter and pulse 15 to 20 times, until the butter is in pea-sized pieces.
Add 6 tablespoons of the vinegar water and pulse 6 times. The dough should start to look crumbly. Test the dough by squeezing a small amount in the palm of your hand. If it easily holds together, it is done. If not, add ½ tablespoon of the vinegar water and pulse 3 more times. Repeat this process as needed until the dough holds together.
Transfer the dough to a lightly floured work surface and knead together until smooth; dough should never come together in the food processor.
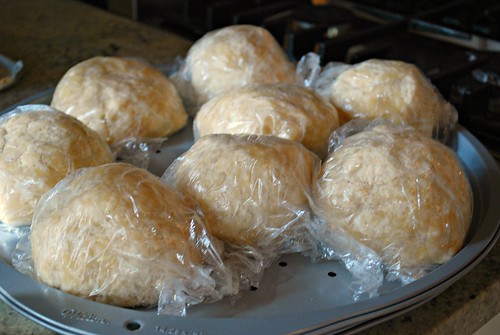
Divide the dough into 2 equal parts and roll each into a ball. Flatter the balls slightly and wrap separately in plastic wrap. Let the dough rest in the refrigerator until ready to use, at least 20 minutes but preferably overnight.
Note: Once the dough is rested, it can be stored in the refrigerator for up to 3 days, or frozen for up to 1 week.
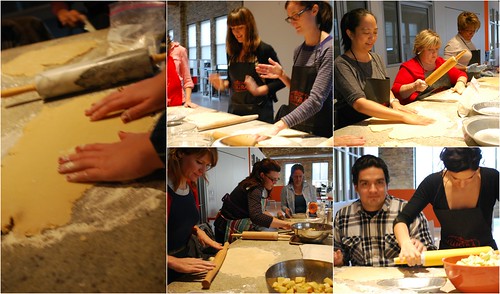
Roll pie crust dough out on a lightly floured surface into a 12-inch or 14-inch circle... the bottom of a round pizza pan makes a great guide for rolling it out. If the dough sticks to the surface or your rolling pin, add more flour.
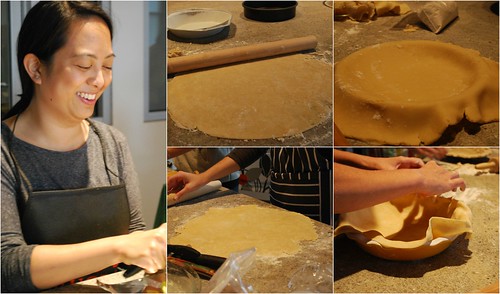
Once you have your dough rolled out to size, carefully roll your dough onto your rolling pin to make it easy to transfer onto your pie plate. Place dough in 9 1/2-inch pie plate and press into place. Trim and fold under the edges and crimp for a decorative crust. Chill in refrigerator while making the filling.
Crust Dust
Mix equal parts all-purpose flour and granulated sugar, then lightly dust it across the bottom of the pie shell before adding the fruit filling. Crust Dust can be stored indefinitely in an airtight container at room temperature.
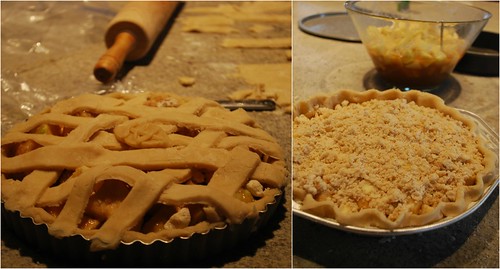
Start with a pie shell full of filling. Gently smooth the top of the filling with a spatula. The filling doesn’t have to be perfectly flat, but any pointy pieces of fruit that stick up may tear the top crust. If the pie base and top have been stored in the refrigerator, let them warm up enough to be pliable before you begin.
If you are cutting decorative shapes out of the top crust, do it now. Try to keep the cutouts toward the center of the top crust. Otherwise, they will get pulled into the crimp and stretched out of shape.
Center the top pie dough round over the pie. Line up the edges of the top and bottom crust and gently roll them under with your thumb and index finger. Work your way back around the pie, pinching the rolled edge up. Make sure the edge is resting on the rim of the pie tin.
Grab the edge of the pie shell with the thumb and index finger of each hand, about 1-inch apart.
Place your left hand ½-inch to the right of the first crimp and repeat the process until you have worked your way around the pie shell. Place your index finger behind each crimp and squeeze the point on the outside of the pie shell with your thumb and index finger.
Vent the pie, then finish according to the recipe instructions.
Pie Wash
Mix equal parts whole milk and cream in a small bowl or liquid measuring cup. Give it a good stir or the cream will float on the top of the mixture. This is used just before baking where the mixture is brushed on top of a double crust pie or lattice top pie.
Mix equal parts whole milk and cream in a small bowl or liquid measuring cup. Give it a good stir or the cream will float on the top of the mixture. This is used just before baking where the mixture is brushed on top of a double crust pie or lattice top pie.


0 التعليقات:
إرسال تعليق