
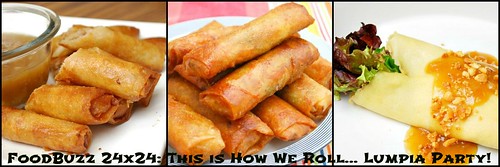
Earlier tonight I threw a This is How We Roll...Lumpia Party! with friends and family. This is a unique meal event because it's reflective of my Filipino culture. Similar to Mexican culture and tamale making, lumpia is a production to make and involves several components: fillings, wrappers, rolling and frying. There are very many versions to making different types of lumpia and it seems as though everyone has their own tips and tricks of the trade. For this party, my mom, who is now a retired caterer that specialized in Filipino cuisine, took the lead and shared her tips and secrets to making different kinds of her lumpia.


For this party, we made 3 different kinds of Filipino lumpia:
Lumpia Shanghai (thin eggroll bites)
Lumpia Shanghai (thin eggroll bites)
Chicken & Vegetable Lumpia (thick eggrolls)

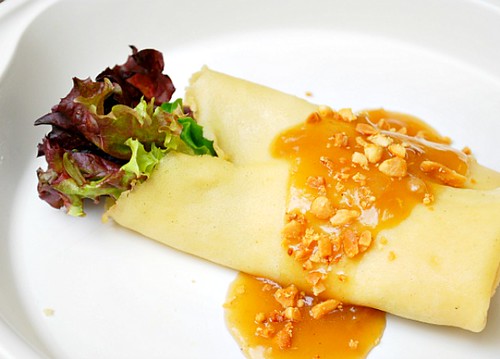
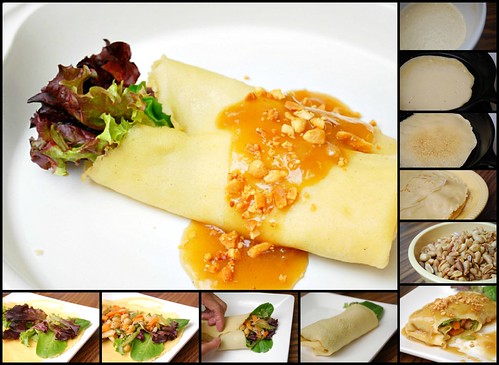
Lumpiang Sariwa (fresh crepe springroll)
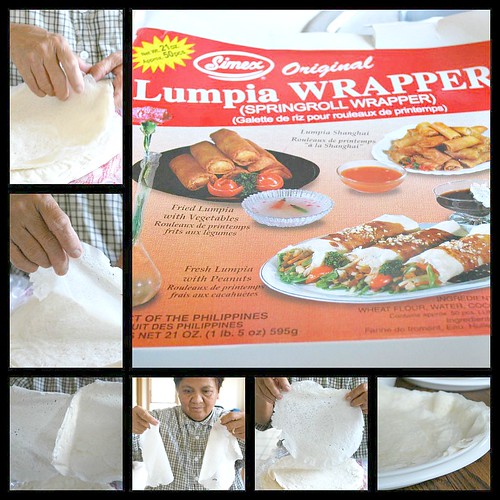
So before we get into the nitty gritty, we need to cover the wrappers. Unlike eggroll wrappers used in Chinese cuisine, traditional lumpia wrappers are much more delicate and thinner. They're almost see through. My mom prefers the Simex brand because it's the original Phillipine lumpia wrapper. These wrappers take a special touch and a whole lot of patience to prepare. They come in a package of 40 and once opened, you'll notice the wrappers all packaged in a stack all stuck together. To use, each individual wrapper must be carefully peeled off from the stack without ripping. When you have the task of prepping the lumpia wrappers, you need to be very patient and careful not to rip or tear these paper thin sheets. Without them, you really can't have a lumpia so it's essential to take your time in handling these. You can find these lumpia wrappers in the frozen section of an Asian market. The package must be defrosted by coming to room temperature before using.
Mom's Tip - Take your time and let the wrappers guide you in peeling. Look for loose edges to determine where to begin peeling the wrappers off one by one. Don't force the wrappers to come apart... just carefully follow the natural way they are stacked. Also, keep a damp tea towel nearby to cover the wrappers you've peeled apart. The towel will help prevent the wrappers from drying out and becoming too brittle to roll with. You'll want to prep the wrappers first by allowing to come to room temperature and save the wrappers as the last component to prep before rolling so that they are used immediately once peeled - which is when they are the most pliable.
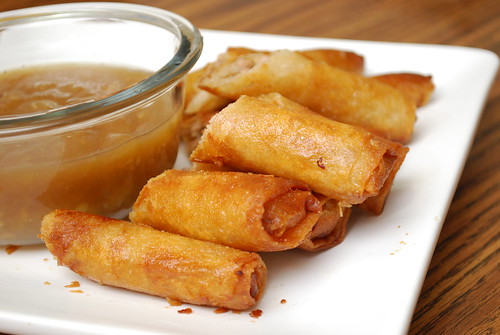
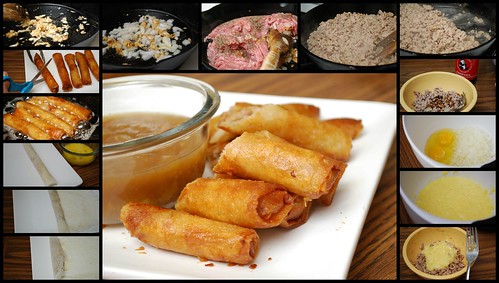
Lumpia Shanghai is a common appetizer at Filipino parties. These are usually expected at any gathering because it's one of those dishes that everyone loves. Lumpia Shanghai are thinly rolled eggroll bites that have a filling of generally pork, beef, chicken, or even shrimp. Some folks make these using a raw filling made with meat and aromatics, which is then rolled, fried and cut into bite sized pieces. My family does things a bit differently where we cook the filling, which is cooled before making the lumpia. Once cooled, wrappers are rolled, fried and cut into bite sized pieces. Here's one of my mom's recipes for Lumpia Shanghai:
2 tablespoons vegetable oil
1/4 cup minced garlic
1/4 cup finely diced onion
1 pound ground pork
1 teaspoon ground black pepper
2 tablespoons oyster sauce
3 eggs
2 tablespoons super finely minced garlic
1 cup super finely diced onion
oil for frying
In a large skillet or wok set over medium heat, add the vegetable oil. When hot, lower the heat add garlic and cook until lightly browned being careful not to darken or burn. Add the onions and sauté until softened and translucent.
Mom's Tip - By slowly browning the garlic in oil, you naturally flavor the oil. Be careful not to burn the garlic - if it's too browned or even burnt, it will give off a bitter flavor in the filling.
Next add the ground pork and black pepper. Turn up the heat to medium high and cook until pork has been browned. Continue cooking the pork until any liquid has evaporated; remove from heat and allow to cool.
Mom's Tip - No need to add salt to the pork. The addition of oyster sauce in the next step will impart the salt in the filling. Be sure to cook the pork until all liquid has evaporated. This will avoid soggy lumpia {due to excess moisture} in the rolling process. Making sure the pork has cooled enough to handle with your hands will also prevent soggy lumpia.While pork is cooling, whisk together 2 eggs and the super finely minced garlic and onions in a large bowl.
Mom's Tip - Because these are going into the filling raw, make sure the garlic and onions are chopped super fine to prevent large chunks that your guests will bite into.Add the oyster sauce to the cooled pork mixture; mix to combine. Then add the egg mixture to the pork and combine to create the filling.
Mom's Tip - By mixing the pork and oyster sauce together first, you allow the pork to pick up on that saltiness of the oyster sauce. The egg mixture is added as a binder. If you combine all of these components together, the pork won't absorb that needed saltiness since it has only been seasoned with ground pepper.Begin the lumpia rolling process by laying out one wrapper in front of you. Add a teaspoon of filling 1 inch from the bottom center of the wrapper. Carefully fold up the bottom of the wrapper over the filling and roll the filling tightly into a thin log, similar to a thin cigar. Continue rolling the wrapper up until you come up 3/4 of the way. Fold the side edges in towards the middle and continue rolling the wrapper up. When you get about 1/2 inch to the top edge of the wrapper, dab some egg wash over the edge and continue rolling the lumpia and seal.
Mom's Tip - Aim to roll the filling nice and tight to prevent air pockets. If rips and tears occur, do your best to cover them up as you roll. If the ends begin to tear, don't fold the side edges too close.Continue with rolling lumpia Shanghai until all filling or wrappers are used up. Once done, prepare a pot with oil or a deep fryer. Bring oil up to 350 degrees for frying. Fry a few lumpia at a time.
Mom's Tip - Be sure your oil is at least 350 degrees for frying. If it's less than that, the wrappers will absorb the oil and come out too greasy. If it's more than that, the wrappers will brown faster and the filling will not get warmed through enough.
Once cooked and golden brown throughout, remove from oil and drain on paper towels. Transfer lumpia to a plate and cut into bite-sized pieces. Serve with dipping sauce (recipe follows at the very end).
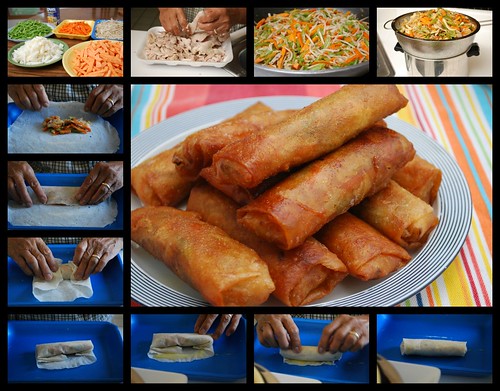
Mom's Tip - Don't reach for the knife to cut the lumpia! Instead, use kitchen shears - they won't crush the eggrolls like a knife would and it's easier to handle with one hand.Next up are traditional lumpia.This lumpia generally takes two days to prepare where the filling is made on day #1 and the rolling is done on day #2. For the filling, a combination of green beens, jicama, garbanzo beans or chickpeas, carrots, bean sprouts and yam or sweet potatoes are prepped by cutting in small dice, batons, and juliennes. The myriad of different cuts along with the different textures offer a complex filling that not only taste good but looks good. After the vegetables have been prepped, boneless and skinless chicken breasts are poached in water, which eventually is used later in a dipping sauce. The chicken is shredded and then sauteed with garlic, onions and the prepped vegetables to create the filling. The filling is strained from any liquid given off by the vegetables and cooled completely. The liquid is reserved and is used later for the dipping sauce. Once the filling has been cooled and drained of excess liquid, then it's time to peel apart the lumpia wrappers and get to rolling! Here's one of my mom's recipes for Lumpia Shanghai:
1 pound fresh green beans, julienned
1 can garbanzo beans or chickpeas, drains
1 medium sized yam, peeled and cut into batons
1 pound fresh bean sprouts, end trimmed
1 large carrot, peeled and julienned
1 medium jicama, peeled and cut into batons
1 pound boneless, skinless chicken breast
2 tablespoons vegetable oil
1 large onion, finely diced
1 head garlic, peeled and minced
1 egg for egg wash
Prep the vegetables as noted above and set aside.
Mom's Tip - Don't cut the vegetables too big. Although they are different sizes, they all need to be able to work together in every bite without competing with each other. Once they are combined, they need to form a well incorporated filling.
Meanwhile, place the chicken in a pot and cover with water. Cook over medium high heat and allow chicken too cook through. Remove chicken from liquid and cool completely to handle with hands. Reserve water in pot - do not throw out. Once chicken is cooled, shred by hand into long thin pieces.
Mom's Tip - The reserved water is full of flavor from the chicken and will be used to make a homemade dipping sauce. Shredding the chicken by hand allows you to have more consistent sized pieces. Aim for long thin pieces of chicken so that when incorporated in the filling and used in the wrapper, you'll have a taste of chicken in each bite of the lumpia.
In a large skillet or wok over medium high heat, add the oil. Once hot, add the onions and garlic, sauteéing until the onions have softened and become translucent. Add the vegetables and shredded chicken and cook until the vegetables have softened and cooked though. With a large pot fitted with a fine mesh sieve or colander on top, transfer the filling mixture, allowing any liquid to strain through. Allow filling to strain overnight to capture all excess liquid and moisture.
Mom's Tip - Straining the liquid does 2 things: ensures the filling is dry so it doesn't cause the wrapper to get soggy when filling and rolling; and the liquid is full of flavor that is used to make the dipping sauce. Prepping the filling the day before will allow enough time for the mixture to strain completely.Begin the lumpia rolling process by laying out one wrapper in front of you. Add a tablespoonn of filling 1 inch from the bottom center of the wrapper. Carefully fold up the bottom of the wrapper over the filling and roll the filling tightly into mini burrito. Continue rolling the wrapper up until you come up 1/2 of the way. Fold the side edges in towards the middle and continue rolling the wrapper up. When you get about 1/2 inch to the top edge of the wrapper, dab some egg wash over the edge and continue rolling the lumpia and seal.
Mom's Tip - Aim to roll the filling nice and tight to prevent air pockets. If rips and tears occur, do your best to cover them up as you roll. If the ends begin to tear, don't fold the side edges too close.Continue with rolling lumpia until all filling or wrappers are used up. Once done, prepare a pot with oil or a deep fryer. Bring oil up to 350 degrees for frying. Fry a few lumpia at a time.
Mom's Tip - Be sure your oil is at least 350 degrees for frying. If it's less than that, the wrappers will absorb the oil and come out too greasy. If it's more than that, the wrappers will brown faster and the filling will not get warmed through enough.
Once cooked and golden brown throughout, remove from oil and drain on paper towels. Transfer lumpia to a plate and enjoy! Serve with dipping sauce (recipe follows at the very end).
Sariwa Wrapper:
2 eggs
1 1/4 cups evaporated milk
1 cup flour {or 140 grams gluten free flour blend}
1 teaspoon salt
2 tablespoons vegetable oil
In a mixing bowl, whisk the eggs and milk together. Add the flour and salt, whisking to combine. Slowly whisk in the oil and set aside.
Heat a 8- or 10-inch nonstick skillet over medium heat. Add 1/4 cup batter to the hot skillet and tilt the pan to distribute the liquid evenly. Cook until the top part of the mixture is dry (about 2 minutes). Using a spatula or your hands, carefully flip over the wrapper to briefly cook the other side. Transfer wrapper to a plate and continue with the remaining batter.
Place the wrapper in a plate then place a lettuce leaf in the middle top part of the wrapper. Spoon the filling and place in the middle of the wrapper (over the lettuce leaf). Close the wrapper by folding the lower part first then roll the sides until the filling is sealed.
Pour the lumpia sauce (recipe follows) over the Lumpiang Sariwa and garnish with crushed peanuts and minced garlic.
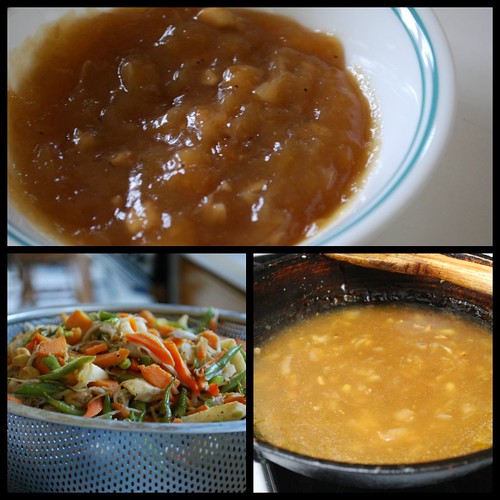
Lumpia Sauce
1 tablespoon soy sauce {or gluten free tamari}
reserved liquid from strained vegetables
2 cups reserved chicken stock
1 tbsp garlic, minced
2 tbsp corn starch (diluted in 4 tbsp water)
In a saucepan, come the ingredients except the cornstarch. Allow the mixture to come to a boil. Dilute the cornstarch in water and pour in the saucepan. Cook until the sauce becomes thick. Serve with lumpia either on side or for Lumpia Sariwa, spread over the top and sprinkled with crushed toasted peanuts.
Overall, this was a great party and I loved that my mom took the lead in the kitchen sharing her tips with me, family, friends and now, readers of my blog. There's no doubt in my mind that these are the best eggrolls I'll ever have and I can appreciate even more all the thought, care and effort put into my mom's recipe. I hope you give it a try and my mom's tips are helpful as they have been to me!
Full Disclosure: As part of the Foodbuzz Tastemaker Program,
I received a stipend from FoodBuzz for hosting this event.


0 التعليقات:
إرسال تعليق